Lesson 01 / Setup
Developer Environment Setup
A step-by-step guide to setting up GitHub, GitHub Desktop, Visual Studio Code, the starter repository, and GitHub Pages.
Course Role
Core
Part of the main course path. Prioritize this before moving to optional polish or deeper references.
Teacher Notes / In-Class Use
Demo Live
- Create a small throwaway repository live so students see GitHub Desktop, VS Code, commit, push, and Pages as one workflow.
- Narrate the difference between the local folder, the GitHub repository, and the published website URL.
Try In Class
- Have students open their project folder in VS Code and confirm they can find the same files in GitHub Desktop.
- Have students make a tiny homepage text change, commit it, push it, and refresh the live GitHub Pages URL.
Submit Or Check
- Every student should have a GitHub repo, a local folder, and a live Pages URL before moving on.
- Ask students to paste their live URL somewhere visible so broken setup can be caught early.
Watch For
- Students editing the extracted starter ZIP folder instead of the GitHub Desktop repository folder.
- GitHub Pages publishing from the wrong branch or waiting on the first deploy without refreshing the Pages settings.
Learning Goals
- Set up a professional-grade web development environment
- Create and publish a class website repository
- Deploy the site with GitHub Pages
Step-by-Step Environment Setup for Web Development
This guide walks you through setting up a professional-grade developer environment using GitHub, GitHub Desktop, and Visual Studio Code.
By the end of the lesson, you will be prepared to manage code collaboratively and deploy websites.
1. Create a GitHub Account
Visit GitHub and click "Sign Up" to create your account.
2. Download and Install GitHub Desktop
Visit GitHub Desktop to download the app.
After installation, open Settings, go to the Accounts tab, and sign in with your GitHub credentials.
3. Download Visual Studio Code
Visit the Visual Studio Code download page to download and install the editor.
4. Access Class Demo Repositories
Navigate to the LSU Web Design GitHub organization to browse class demos.
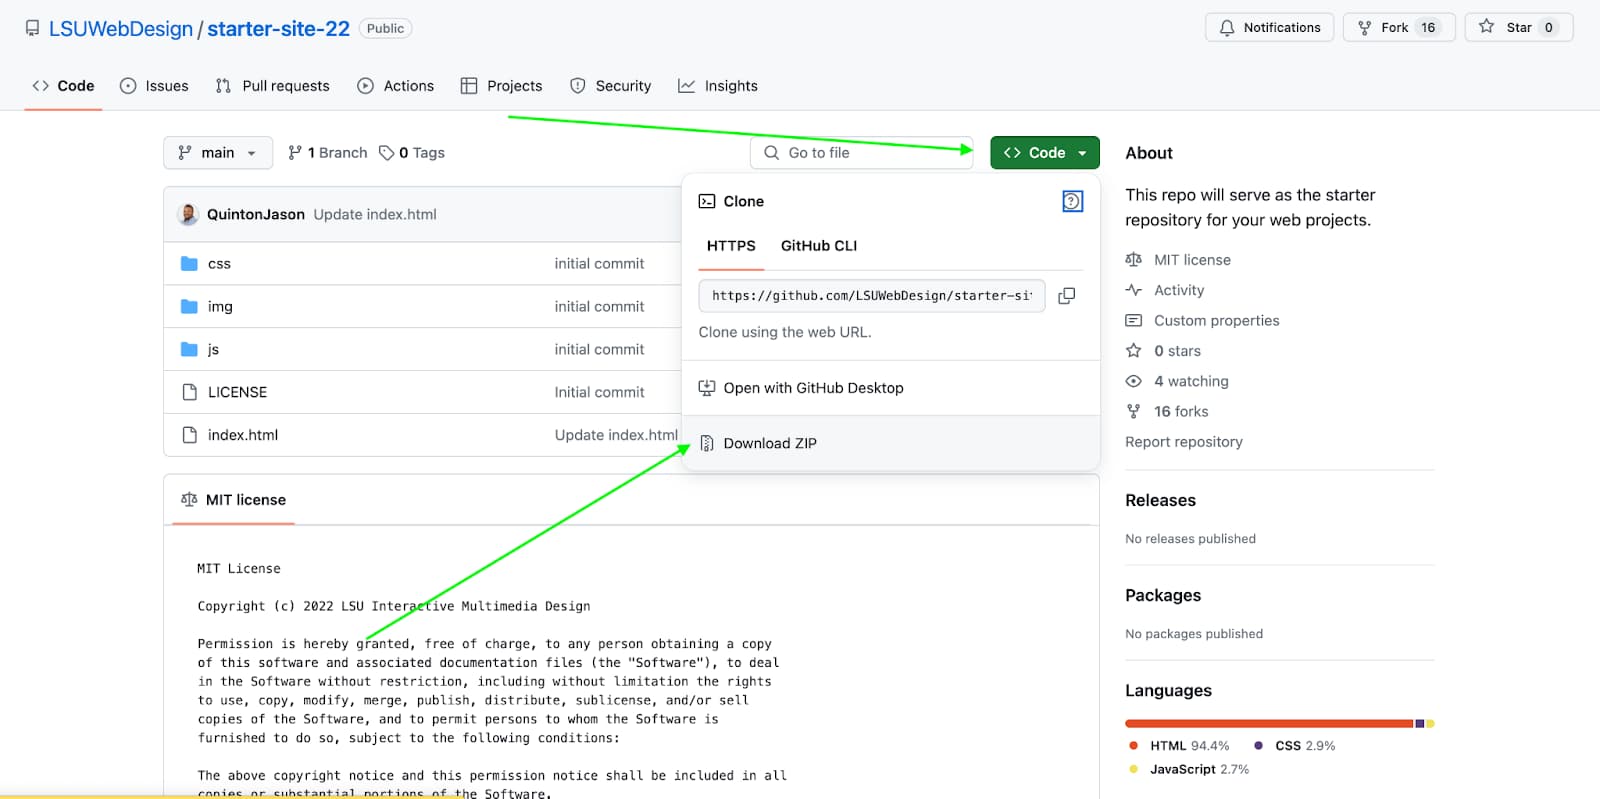
5. Download the Starter Repository
Go to the starter-site-22 repository.
Click the "Code" button, then "Download ZIP." Extract the ZIP file and remember its location.
6. Prepare Your Project Directory
Export the contents of starter-site-22-main.zip.
This folder will be your working website base folder.
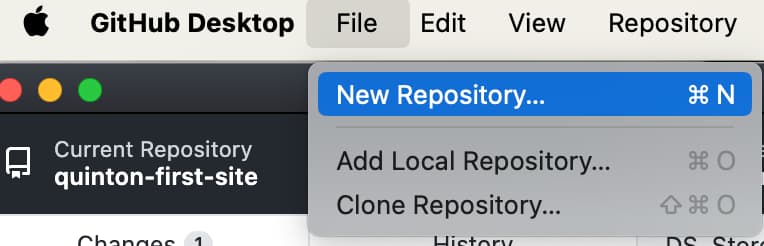
7. Create a New Repository in GitHub Desktop
Open GitHub Desktop.
Click File -> New Repository.
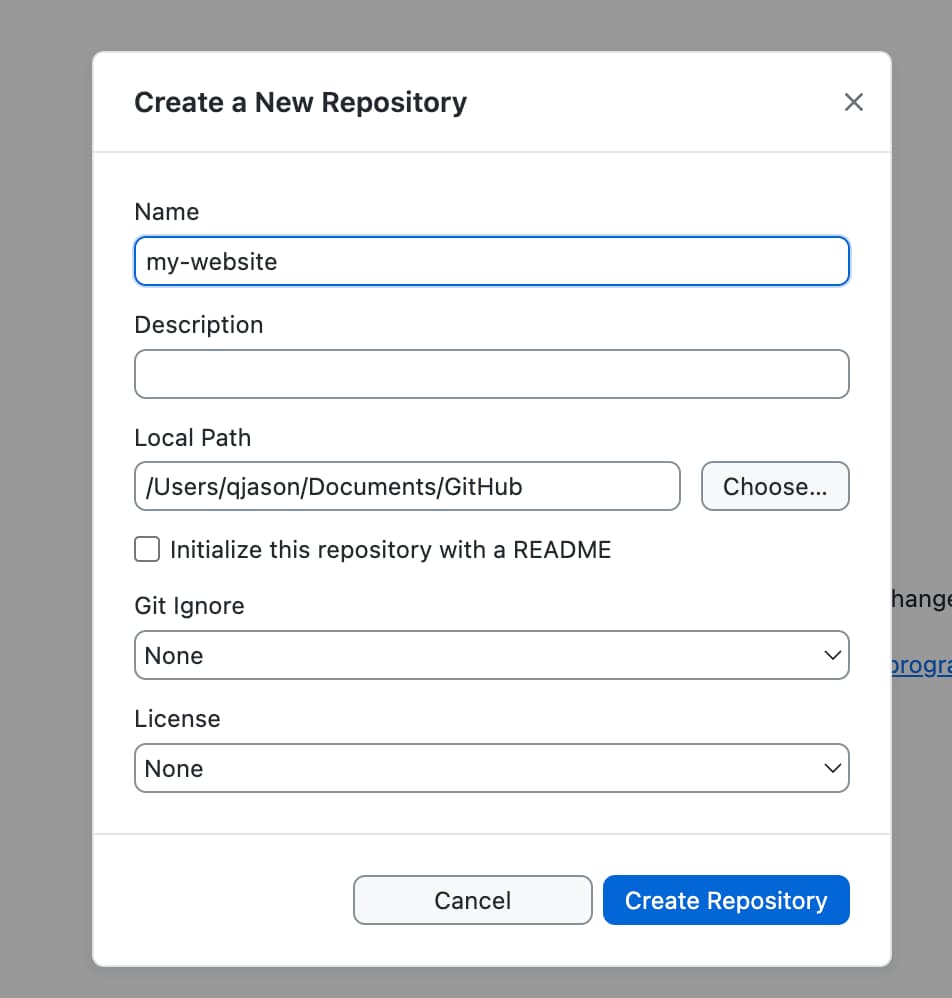
Name your site using dashes instead of spaces, such as my-website.
Click "Create Repository."
8. Publish Your Repository
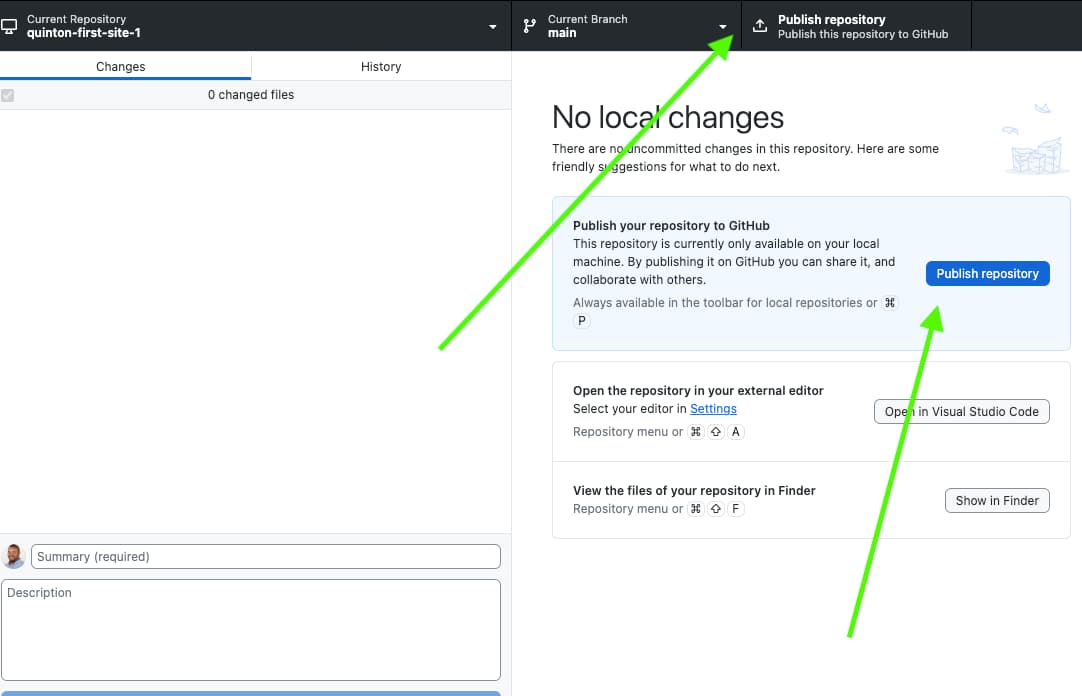
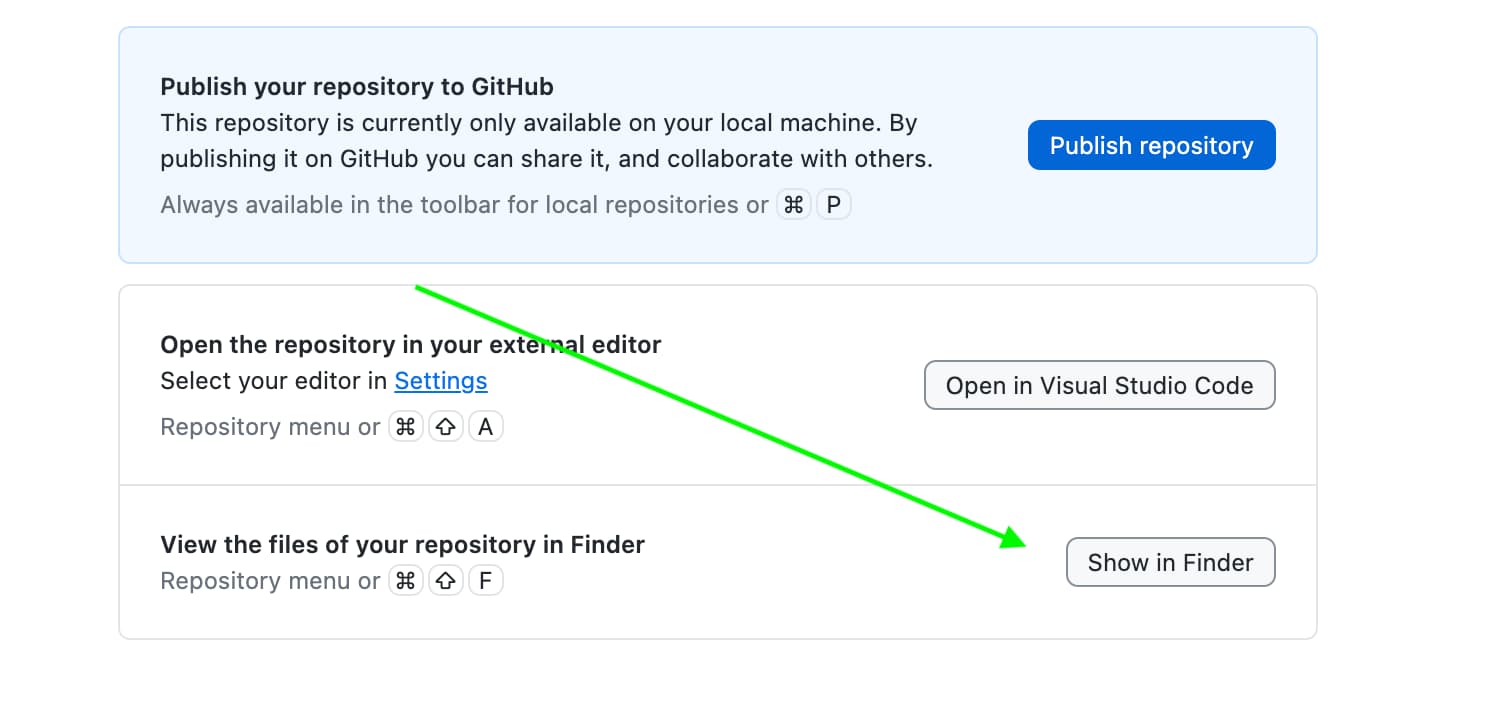
Click "Publish Repository" to make it accessible on GitHub online.
9. Understanding the GitHub Desktop Interface
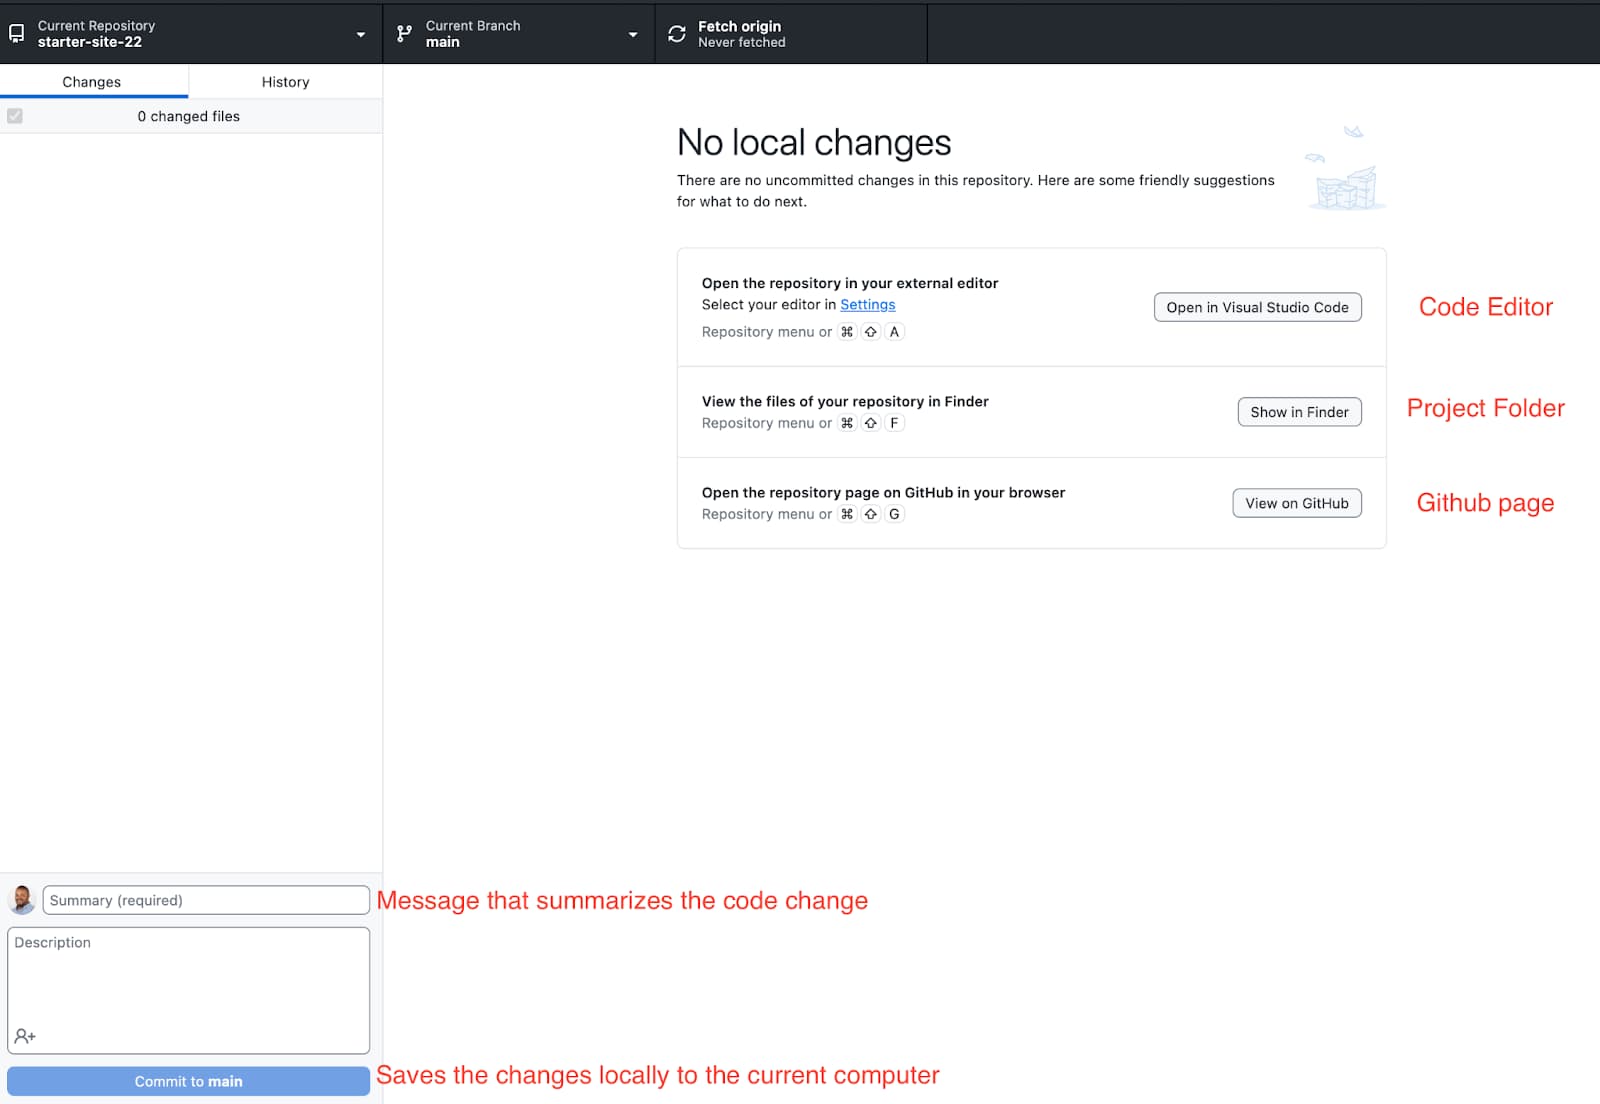
- Open in Visual Studio Code: opens the project in VS Code.
- Show in Finder: opens the local folder.
- View on GitHub: opens the GitHub page in the browser.
10. Move Starter Files
With both your empty project folder and the extracted starter folder open, copy all starter files into the new GitHub project folder.
11. Commit and Push Changes
Back in GitHub Desktop, verify the file changes listed.
Write a descriptive commit message, then click "Commit to main."
Afterward, click "Push origin" to upload changes to GitHub.
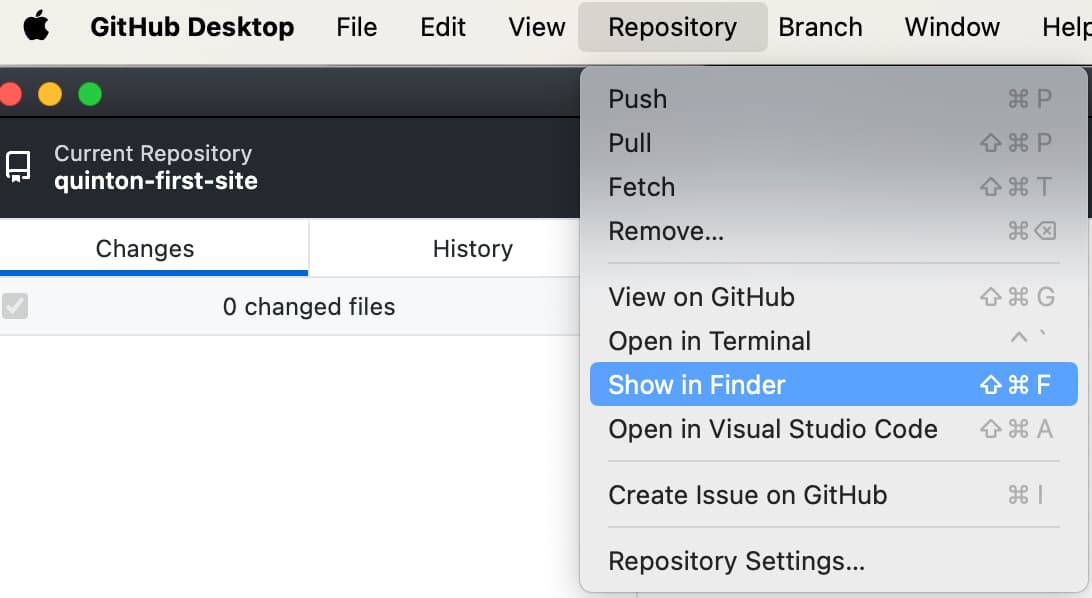
If you have changes and need to find your files, use Repository -> Show in Finder.
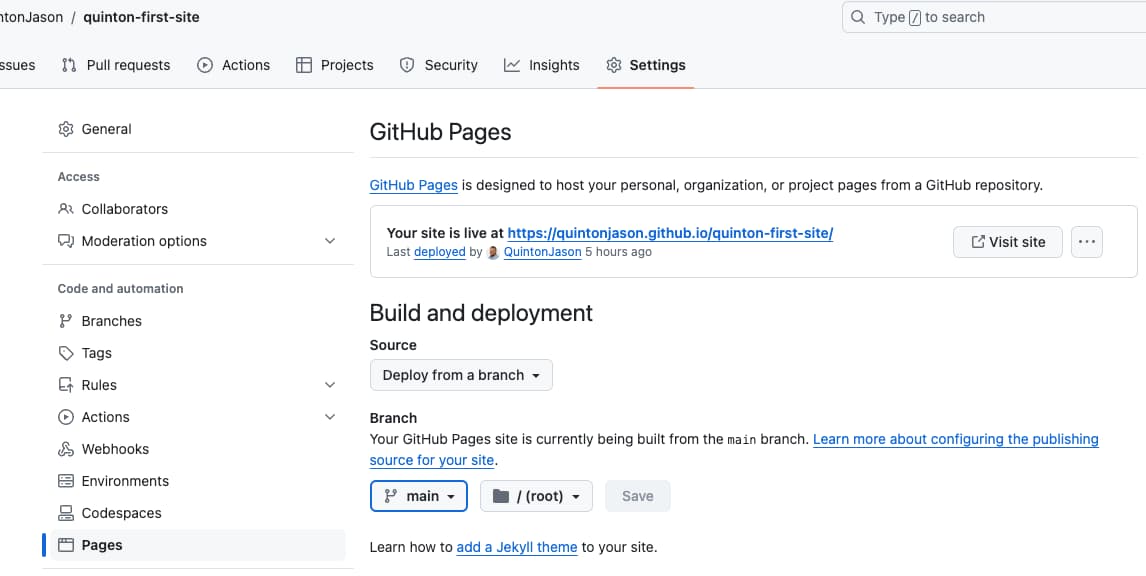
12. Enable GitHub Pages
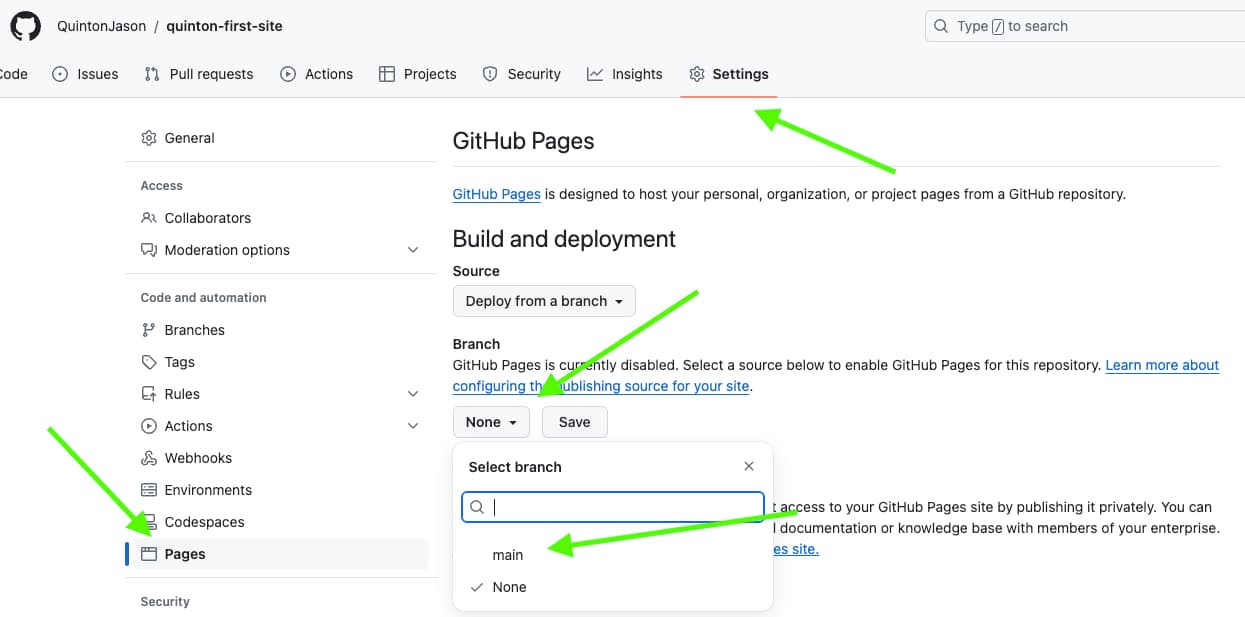
On your GitHub repository page, go to Settings -> Pages.
Under Build and Deployment, set the Branch dropdown to main.
Click "Save."
13. Launch Your Website
Wait a few minutes, then refresh the Pages settings.
A public URL to your live website will appear.
Click "Visit Site" to see your published work.
Congratulations. You now have a fully functioning developer setup and a live website hosted with GitHub Pages.
Checkpoint
Before moving on, make sure these feel true.
- I can open the correct project folder in VS Code.
- I can commit and push a small change through GitHub Desktop.
- I can find and refresh my published GitHub Pages URL.
Project Connection